may contain affiliate links
Hello and happy Friday! Wow, we made it through a week of daily nail art and 3 videos. As I mentioned yesterday, todays nail art also have a tutorial on Youtube so lets check out all of the details.
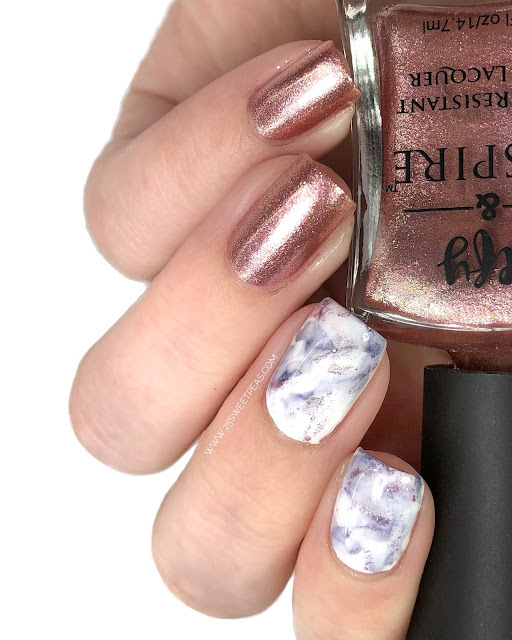
This is a Sharpie Mable accented with a new polish I picked up at Target. Todays video shows you exactly how I did this marble. Below I'll list my step by step process. Plus the what you need list! (Only focusing on the marble nail)
What you Need
White Nail Polish
Quick Dry Top Coat
Rubbing Alcohol 91% (This is required to be this high. I've tried lower ones and they don't work)
Little dish for the alcohol
Small Brush (It may get stained)
Metallic Nail Polish
How To
1. Prep nails as desired and apply your top coat. For this on the nails you plan on creating the marble on I would suggest using a quick dry top coat.
2. Once your nails are 100% dry its sharpie time. Grab a sharpie and draw it on to your white nails. (See Video) And stay away from edges of your nails. You don't want to get to close to cuticle.
3. Dip your brush in the rubbing alcohol and then go over the sharpie spots to move it around a fade the sharpie. Repeat until you are happy with the look. (See Video for additional tips)
4. If any areas on your nails feel too dark for your liking... go in with some white acrylic paint and add in some detail lines here and there. You don't want these new white lines to be too bold and obvious so I suggest watering down the paint, or once you apply it tap it with a finger to almost give a sponged like effect while keeping majority of the paint on the nail.
5. Now grab a sparkling polish, or metallic polish and add a little sparkle to your marble. I diluted the polish I selected with some rubbing alcohol as seen in the video and applied it here and there on my nail while slightly following the main design I already did.
6. Let everything dry and apply your favorite top coat!
This was my first super successful sharpie nail art and I'm so happy with it. It came out better than I expected mid way though the mani. Seriously I got t0 the part of putting the rubbing alcohol on the sharpie and it was still a bit too dark and I was like oh no this isn't going to work but I just kept going and as you saw, or can see in todays video, it got better. By the top coat time I really liked it and the next morning after having done them I loved them. Plus I used the Salon Perfect Top coat and its been adding major shine, and I was just loving it!
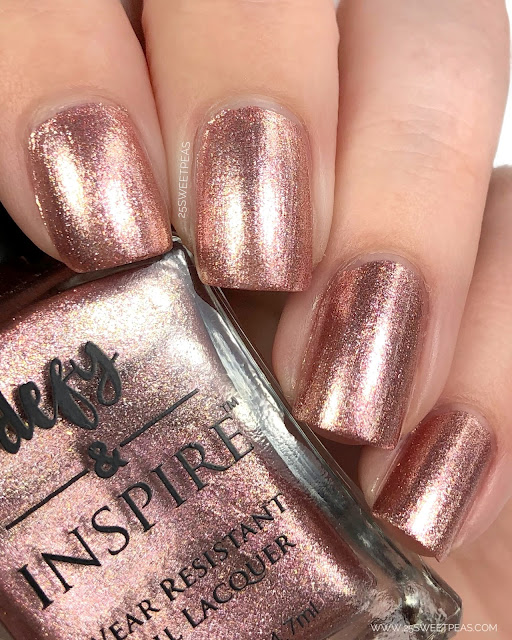
No lets chat about the other polish worn in this post. That gorgeous rose gold shade that I am OBSESSED with is called Do More by Defy & Inspire which is Targets nail polish for those of you who did not know. I love their polishes and they have some new releases out right now and this is one of the most recent ones!
Do More
2 Coats
A rose-y metallic.
I love this polish so much! Its lovely for one but the formula was excellent and the brush being on the larger side is something I personally prefer so thats something I've always liked about Defy & Inspire. I would say it has decent wear time on me. In the past their polishes has always wore well on me and this one is just like that. :) Such a fan! I plan on featuring it in a video on a later date so you can see it in action!
Well guys that is it for today and a wrap for the Digital Dozen marble week. Hopefully you aren't too tired of marble! :) I had fun making a point to do more nail art and to try new and different things. Anywhooo, thanks for checking out today post, I hope it was informative/helpful to some. If you have any questions about how to do the mani let me know. :)
Happy Painting!
~25 Sweetpeas


Oh wow! This looks amazing, so realistic! I can't believe I still haven't tried sharpie nails.
ReplyDelete